
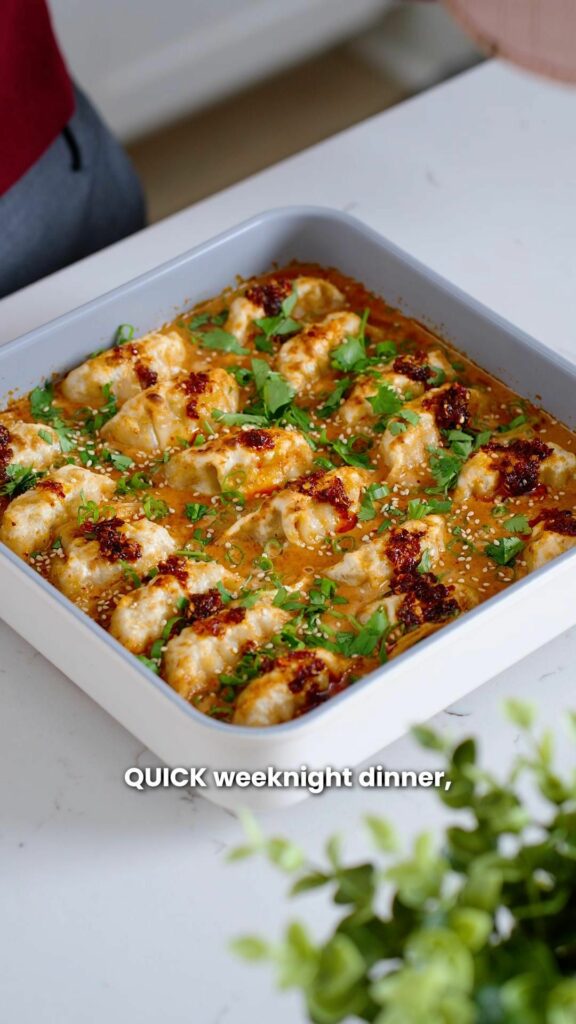
The first thing you notice is the sound: a fork cracking through a golden, bubbly crust of dumplings that have baked into each other like a savory pull-apart bread. Underneath, the sauce is glossy and clinging, and the tops are crisp where they caught the heat. This is the tray bake that took over my feed, and after one bite you will understand exactly why.
Advertisements1
The genius of it is that frozen dumplings do all the heavy lifting. You do not boil, you do not fry, and you do not babysit a pot of water. You arrange them in a baking dish, pour over a quick sauce, and let the oven turn them tender on the bottom and crisp on top. The reason it works is that the dumplings steam in their own moisture while the exposed edges brown, giving you two textures in one bite.
I make this on nights when I want something that feels like a treat but takes less effort than ordering in. Everything comes together in one dish, and the cleanup is a single pan. Taste as you go.
Why You'll Love This Recipe
About the Ingredients
24 frozen dumplings (about 1.5 lb / 680g), such as pork and chive or vegetable
No need to thaw them, which is the whole point of this shortcut. If you cannot find dumplings, frozen potstickers or gyoza work exactly the same way.
2 tbsp neutral oil, such as canola or vegetable
This keeps the dumplings from sticking and helps the bottoms crisp. Olive oil works in a pinch but has a stronger flavor.
3 tbsp soy sauce
Use regular soy sauce for a balanced saltiness. Tamari is a great gluten-free swap and tastes slightly richer.
2 tbsp rice vinegar
Rice vinegar is mild and slightly sweet. If you only have apple cider vinegar, use half the amount since it is sharper.
1 tbsp honey
Honey balances the salt and helps the sauce glaze. Maple syrup or brown sugar can stand in one-for-one.
2 tsp chili garlic sauce, plus more to taste
This is the gentle heat that makes the sauce sing. Sambal oelek or a spoon of gochujang are excellent substitutes.
1 tsp toasted sesame oil
A little goes a long way for that nutty aroma. Toasted is key, so check the label before buying.
3 cloves garlic, finely grated
Fresh garlic gives the brightest flavor. Jarred minced garlic works but use a little extra since it is milder.
1 tbsp cornstarch whisked into 1/2 cup cold water
This slurry thickens the sauce into a glossy glaze. Arrowroot powder or potato starch can replace it.
2 scallions, thinly sliced, plus 1 tsp sesame seeds to finish
Add these after baking so they stay fresh and green. Thinly sliced chives are a fine swap if scallions are missing.
Tips & Tricks
Do not thaw the dumplings
Frozen dumplings hold their shape and steam gently from the inside, so thawing makes them soggy and prone to sticking.
Leave a little space between dumplings
Packing them too tightly traps steam and you lose the crisp edges, so arrange them snug but not squished.
- Whisk the cornstarch slurry again right before pouring: It settles fast, and re-whisking guarantees an even, glossy sauce instead of clumps.
Pro Tips
Step-by-Step Instructions
1. Heat the oven and oil the dish
Preheat the oven to 425F (220C) and brush a 9×13-inch baking dish with 1 tbsp of the neutral oil. Oiling the dish first is what gives the bottom layer its crisp, caramelized edge instead of a sticky one.
2. Arrange the dumplings
Place the frozen dumplings in the dish in a single snug layer, flat sides down, leaving small gaps between them. Flat sides down means maximum surface area touching the hot pan for browning.
3. Whisk the sauce
In a small bowl, whisk the soy sauce, rice vinegar, honey, chili garlic sauce, sesame oil, grated garlic, and the cornstarch slurry until smooth. The cornstarch is what turns this thin liquid into a clinging glaze in the oven.
4. Pour and toss gently
Drizzle about half the sauce evenly over the dumplings and brush or spoon it so every piece gets coated. Reserve the remaining sauce for drizzling after baking so the flavor stays fresh and punchy.
5. Bake until golden
Bake at 425F (220C) for 28 to 32 minutes, until the edges are bubbling and the dumpling tops are deep golden brown. You will hear a gentle sizzle and see the sauce thicken around the edges.
6. Broil for the finish
Switch the oven to broil and cook for 2 minutes, until the tops are spotty and crisp. Stay by the oven, because broilers go from golden to burnt quickly.
7. Rest and garnish
Let the dish rest for 5 minutes, then drizzle with the reserved sauce and scatter with scallions and sesame seeds. Resting lets the glaze set so the dumplings lift out neatly.
Delicious Variations
Spicy Peanut Version
Stir 3 tbsp peanut butter into the sauce before baking for a richer, nuttier glaze that pairs beautifully with vegetable dumplings.
Creamy Chili Drizzle
Whisk 3 tbsp mayo with 1 tsp chili garlic sauce and a squeeze of lime, then drizzle it over the hot bake right before serving.
Mushroom Soy Butter
Swap the honey for 1 tbsp melted butter and add 1 tsp dried mushroom powder to the sauce for an earthy, umami-forward twist.
How to Store Viral Dumpling Bake
Refrigerator
Store leftovers in an airtight container in the refrigerator for up to 3 days. Keep the garnish separate so it stays crisp.
Freezer
Freeze cooled dumplings in a single layer on a tray, then transfer to a freezer bag for up to 2 months. Freeze before garnishing.
Reheating
Reheat in a 375F (190C) oven for 10 to 12 minutes, or in an air fryer at 350F (175C) for 5 to 6 minutes, until crisp at the edges. Avoid the microwave if you want crispness.
Frequently Asked Questions
Q: Can I make this dumpling bake with fresh dumplings instead of frozen?
Yes, but reduce the bake time to about 15 to 18 minutes since fresh dumplings cook much faster. Watch for bubbling edges and golden tops as your cue to pull them out.
Q: Do I need to thaw frozen dumplings before baking?
No, bake them straight from frozen, which is what makes this recipe so easy. Thawing releases extra moisture and makes them stick together and turn soggy.
Q: What sauce goes best with a dumpling bake?
A soy, rice vinegar, honey, and chili garlic sauce blend is the classic pairing because it balances salty, tangy, and sweet. Add a creamy mayo-chili drizzle if you want extra richness.
Q: How do I keep the dumplings from sticking to the pan?
Brush the baking dish generously with oil before arranging the dumplings and leave small gaps between them. A nonstick or ceramic dish also helps them release cleanly.
Q: Can I make this dumpling bake ahead of time?
You can assemble it up to a day ahead, cover, and refrigerate, then bake when ready. Add 5 extra minutes to the bake time since the dish starts cold.
If you make this viral dumpling bake, I would love to hear how it turned out. Snap a photo of those golden edges, tag me, and tell me which dipping sauce you went with. Taste as you go.
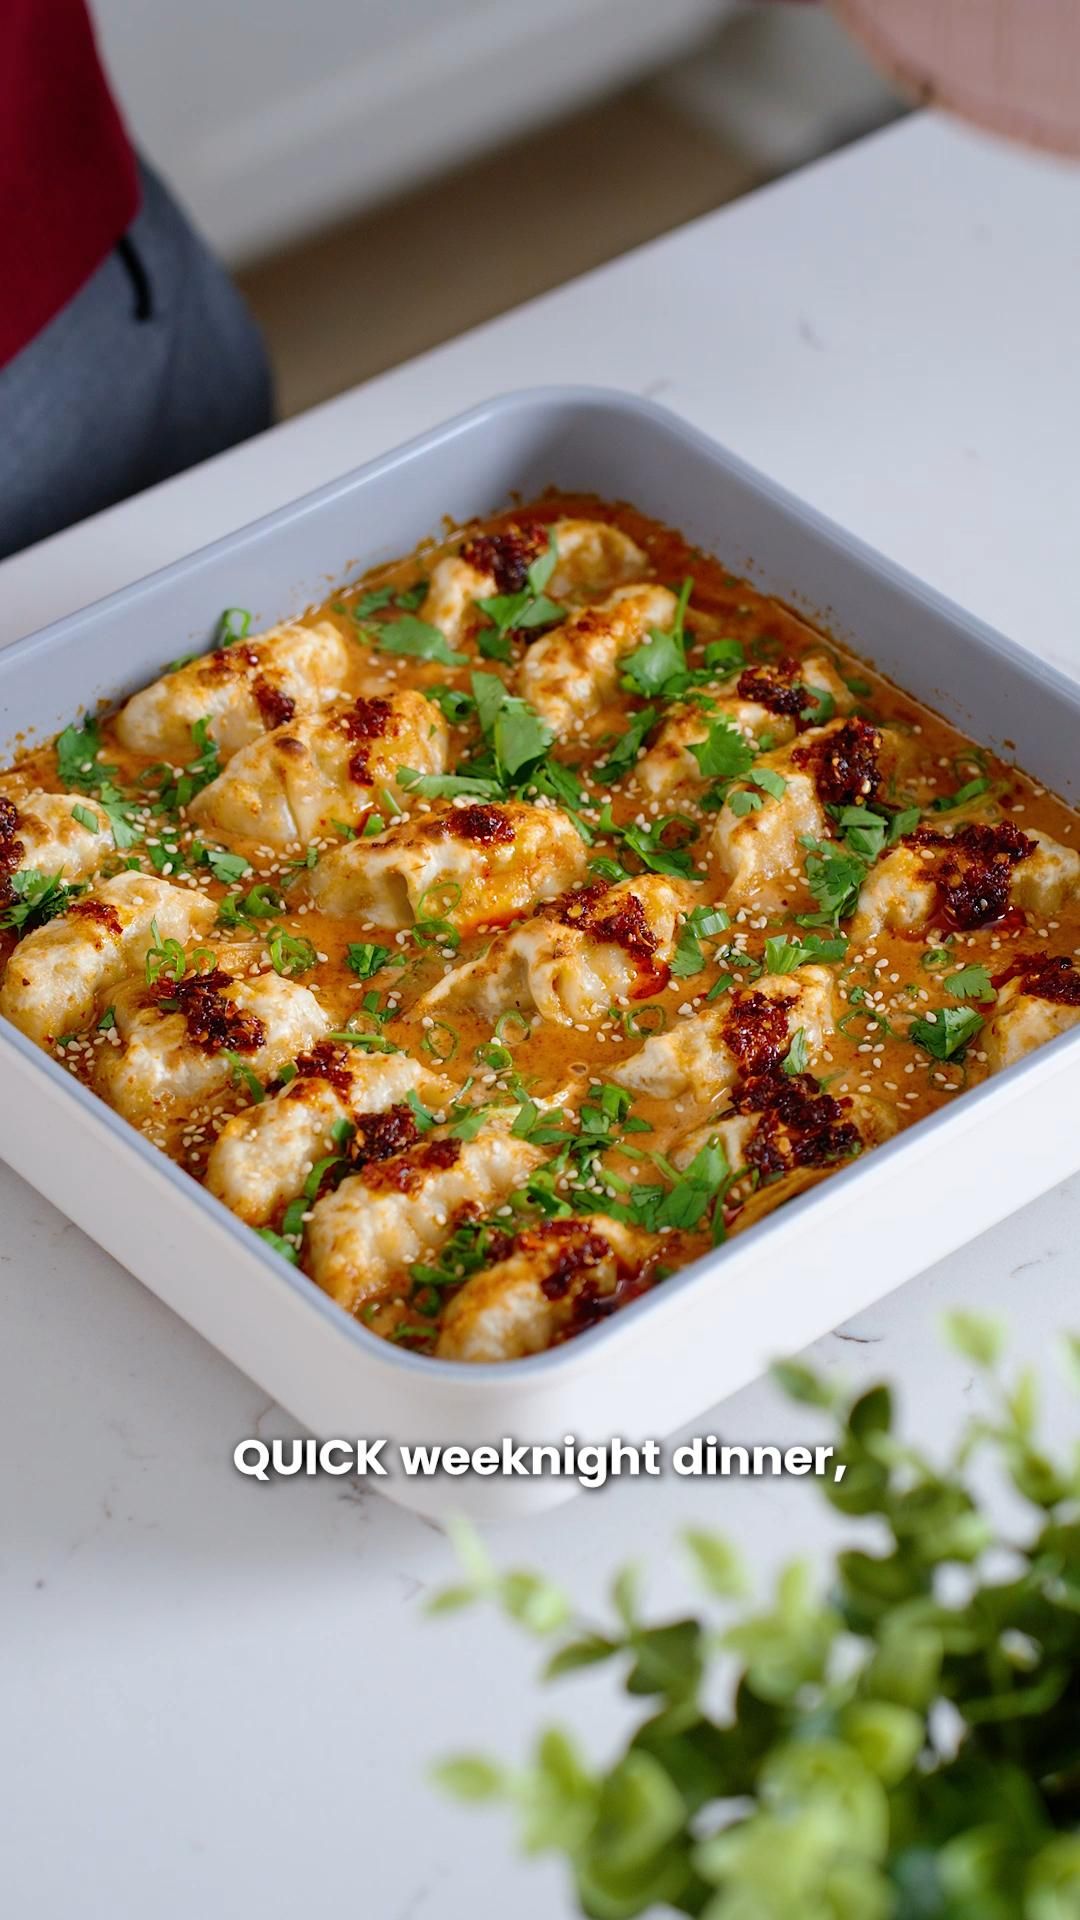
Viral Dumpling Bake
This viral dumpling bake turns frozen dumplings into a golden, saucy one-pan dinner with crisp edges and a creamy chili-garlic drizzle.
🧂 Ingredients
- 24 frozen dumplings (about 1.5 lb / 680g), such as pork and chive or vegetable
- 2 tbsp neutral oil, such as canola or vegetable
- 3 tbsp soy sauce
- 2 tbsp rice vinegar
- 1 tbsp honey
- 2 tsp chili garlic sauce, plus more to taste
- 1 tsp toasted sesame oil
- 3 cloves garlic, finely grated
- 1 tbsp cornstarch whisked into 1/2 cup cold water
- 2 scallions, thinly sliced, plus 1 tsp sesame seeds to finish
📋 Instructions
- 1Heat the oven and oil the dish — Preheat the oven to 425F (220C) and brush a 9×13-inch baking dish with 1 tbsp of the neutral oil. Oiling the dish first is what gives the bottom layer its crisp, caramelized edge instead of a sticky one.
- 2Arrange the dumplings — Place the frozen dumplings in the dish in a single snug layer, flat sides down, leaving small gaps between them. Flat sides down means maximum surface area touching the hot pan for browning.
- 3Whisk the sauce — In a small bowl, whisk the soy sauce, rice vinegar, honey, chili garlic sauce, sesame oil, grated garlic, and the cornstarch slurry until smooth. The cornstarch is what turns this thin liquid into a clinging glaze in the oven.
- 4Pour and toss gently — Drizzle about half the sauce evenly over the dumplings and brush or spoon it so every piece gets coated. Reserve the remaining sauce for drizzling after baking so the flavor stays fresh and punchy.
- 5Bake until golden — Bake at 425F (220C) for 28 to 32 minutes, until the edges are bubbling and the dumpling tops are deep golden brown. You will hear a gentle sizzle and see the sauce thicken around the edges.
- 6Broil for the finish — Switch the oven to broil and cook for 2 minutes, until the tops are spotty and crisp. Stay by the oven, because broilers go from golden to burnt quickly.
- 7Rest and garnish — Let the dish rest for 5 minutes, then drizzle with the reserved sauce and scatter with scallions and sesame seeds. Resting lets the glaze set so the dumplings lift out neatly.